LabelScope

With LabelScope, you can turn anything you see on your Mac's screen into a fine-looking printed label. LabelScope makes label printing easy and fun. Since LabelScope works with many different kinds of printers, you can choose the best printer for the job and know that LabelScope will offer you the same easy to use interface.
The quickest way to learn LabelScope is to watch our introduction video.

Supported Printers
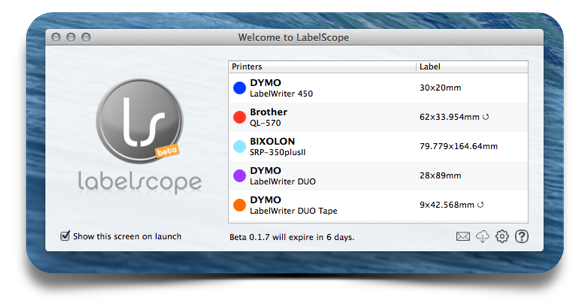
Be sure to check the list of supported printers. If your printer is not listed, contact us.
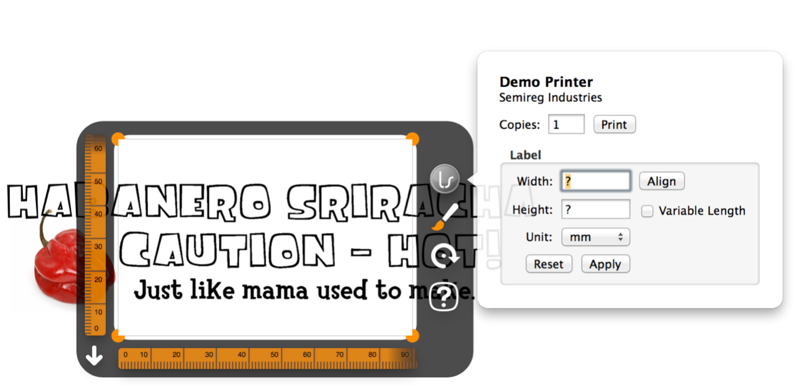
Test-drive LabelScope without a printer. Open up LabelScope Preferences and click "Toggle Demo Printer." This opens a virtual label printer that demonstrates how LabelScope can convert the screen into a black and white label.
For programming BIXOLON and Epson receipt printers see the Save to Memory manual page.
Setting the Label Size
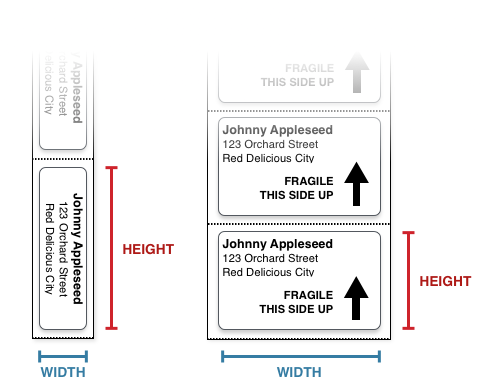
The first time you use LabelScope you will need to enter the label size currently loaded in the printer. The height of the label will always be the measurement of the direction of travel of the label as it exits the printer. The width always equals the length of the cut or perforated edge.
Once the size is applied, LabelScope will resize.
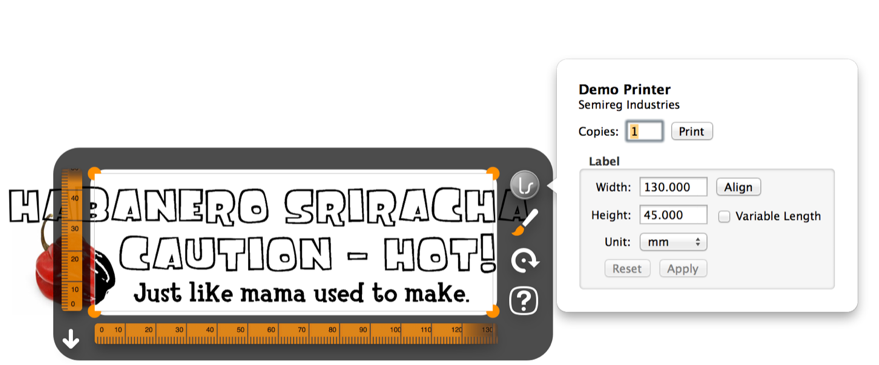
Every time you change labels you will need to enter the new label size.
Label printers made by Brother will automatically adjust the label size based on the installed cartridge.
Example Measurements
The easiest way to measure a label is with a millimeter ruler.
Adjusting The Scope
LabelScope can be adjusted to fit almost anything on your screen.
Zooming
LabelScope can be made larger or smaller by using the pinch gesture, or by dragging the round corner dots.

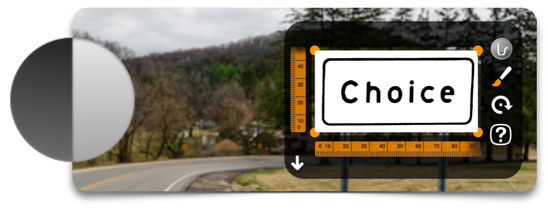
Rotating
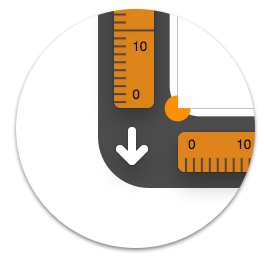
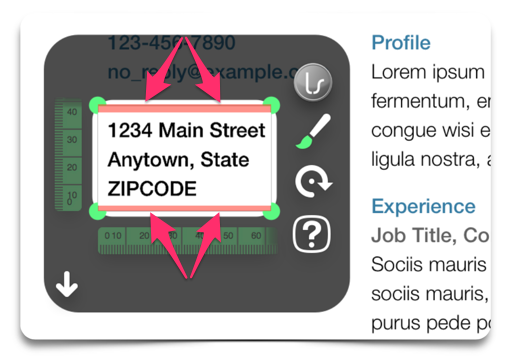
The arrow in the bottom-left of the LabelScope shows the direction of the label as it exits the printer. An arrow pointing down means that the label will be printed in normal orientation. This is the default.
Depending on how your want your label to look, click on the rotation icon to rotate the label 90 degrees. Once rotated, notice how the direction of travel arrow points to reflect the new feed direction. Changing the rotation is like turning the label printer on it's side.

Style
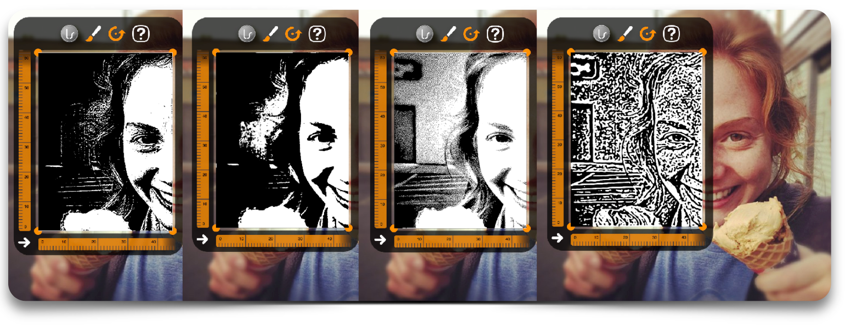
Since label printers can only print black and white the visible screen must be converted. This process is called rasterization. Choose from four styles to convert your screen to black and white.
- Smooth - Text and graphics of different colors
- Plain - Text and graphics of similar color
- Dot - Images and photos
- Wood - Artistic flare
Sensitivity
A smaller sensitivity generally creates a lighter label. A larger sensitivity generally creates a darker label. Changing the sensitivity is critical to creating high quality labels. As a shortcut, choose your filter and scroll on top of LabelScope to quickly adjust the sensitivity.
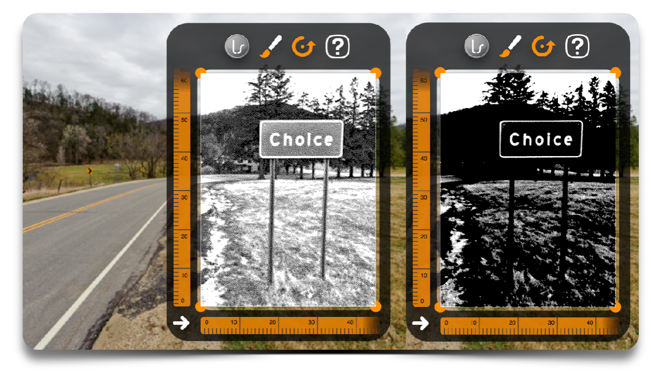
Invert Black/White
Inverting the black and white is useful when printing white text on a black background. Try inverting the color to create a label with black text.
Preset
Presets are used to quickly adjust based on popular settings.
Color
Although thermal printers can only print in black and white, you can add color to the LabelScope interface. If you are using colored labels (like a bright green label), then selecting "Use As Label Color" will replace the white areas with the chosen color. This gives you a more accurate preview.

Printing
Double-click LabelScope to print a label. It's that easy!
Alignment
Minor adjustments can be made to each printer to ensure aligned labels. Click the LabelScope logo and then click "Align." Each value can be calibrated in the range of -20 to 20. Click "Test" to print a test label. Click "Apply" to save your changes.
- Left/Right - Move the printed image to the left (-) or right (+)
- Up/Down - Move the printed image upward (-) or downward (+)
- Zoom - Decrease (-) or increase (+) the printed image size
- Bottom Stretch - Stretch the label closer to the bottom (+) or further away from the bottom (-)
Keyboard Shortcuts
space or enter or command + p or double-click
Rotate
tab or click rotation icon
Zoom
+ and - or use pinch gesture on trackpad
Movement
↑ → ↓ ← and use command or shift to modify speed
Sensitivity
1-9 or use scroll gesture on trackpad or scroll wheel on mouse
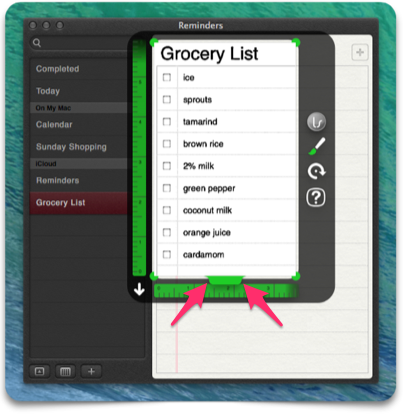
Variable Length - Tape
Printers that are loaded with "tape" or "ribbon" paper (like a receipt printer) can print labels of arbitrary lengths. When this option is available, a colored tab will be displayed at the end of the direction of travel. This tab can be dragged smaller or larger as needed.
Unprintable Zones
Some printers are unable to print to the edges of the label. The red areas on LabelScope's virtual label signify unprintable zones and are based on the printer currently in use. If you need to print to the edge of the label please consider label printers made by Zebra.
Multiple Printers
LabelScope supports multiple printers simultaneously.
Saving to Memory
LabelScope supports receipt printers. Some receipt printers can be programmed to quickly print a saved image. Learn more about this process at the Save to Memory manual page.
Troubleshooting
Printer Not Recognized
Make sure the printer is powered on. E-mail us with the printer model.
Printer Not Responding
Turn off and turn on the printer. Try unplugging from USB.
Printer Misaligned
Double check the size of the label. Are you sure that the width and height are accurate? Use the label alignment options described above.
Blank Labels
If the screen is all white or black, try changing the sensitivity. Double-check that the label size is set properly.
LabelScope Missing
Try using the arrow keys to move LabelScope. If that doesn't work, open the LabelScope Preferences and click "Reset Attached Devices." Quit LabelScope and reopen.
comments powered by Disqus